« Previous
Next »
« Previous
Next »
MICROSOFT EXCEL 2013
DATA VALIDATION
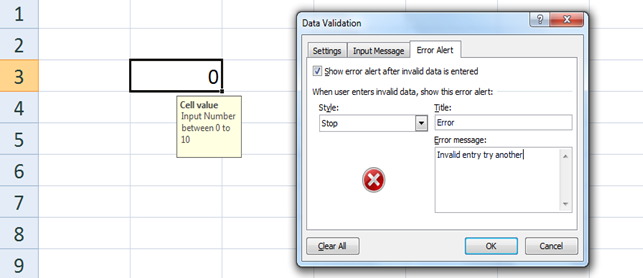
MS Excel data validation tool allows you to set up certain rules that say what can be entered into a cell. For example, you may want to limit data entry in a particular cell to whole numbers between 0 to 10. If the user makes an invalid entry, you can display a custom message as “Input number between 0 to 10” and if the user enter wrong number it display an error alert “Invalid entry try another”. To specify the type of data allowable in a cell or range, follow the steps below while you refer to which shows all three tabs of the Data Validation dialog box.
- Select the cell or range.
- Choose Data >> (In Data Tools Group) Data validation. Excel displays its Data validation dialog box having 3 tabs settings, Input message and Error alert.
- Settings Tab: Here you can set the type of validation you need. Choose an option from the Allow drop-down list. The contents of the Data Validation dialog box will change, displaying controls based on your choice.
- Any Value: Selecting this option removes any existing data validation.
- Whole Number: The user must enter a whole number. For example, you can specify that the entry must be a whole number greater than or equal to 50.
- Decimal: The user must enter a number. For example, you can specify that the entry must be greater than or equal to 10 and less than or equal to 20.
- List: The user must choose from a list of entries you provide. You will create drop-down list with this validation. You have to give input ranges then those values will appear in the drop-down.
- Date: The user must enter a date. You specify a valid date range from choices in the Data dropdown list. For example, you can specify that the entered data must be greater than or equal to January 1, 2014, and less than or equal to December 31, 2013.
- Time: The user must enter a time. You specify a valid time range from choices in the Data dropdown list. For example, you can specify that the entered data must be later than 12.00 p.m.
- Text Length: The length of the data (number of characters) is limited. You specify a valid length by using the Data drop-down list. For example, you can specify that the length of the entered data be 1 (a single alphanumeric character).
- Custom: To use this option, you must supply a logical formula that determines the validity of the user’s entry (a logical formula returns either True or False).
- Input Message tab: You can set the input help message with this tab. Fill the title and Input message of the Input message tab and the input message will appear when cell is selected.
- Error Alert Tab: You can specify error message with this tab. Fill the title and error message. Select the style of the error as stop, warning or Information as per you need.
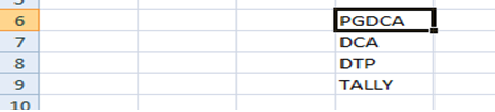
- On another sheet, type the items you want to appear in the drop-down list.
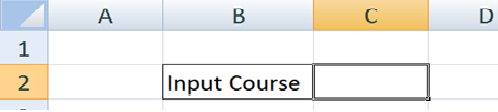
- Click on the cell where you create drop-down list for example select cell C2
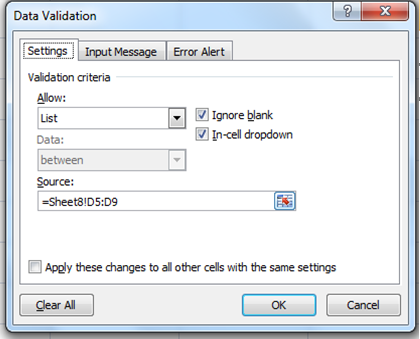
- On the Data tab, click Data Validation, the data validation dialog box will display.
- Select List from Allow drop down list and type the address of list cell range in Source box like below.
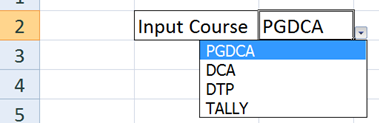
- Click on Ok button and get the result like below.


DROP-DOWN LIST
Drop-down lists in Excel are helpful if you want to be sure that users select an item from a list, instead of typing their own values.